
How to Sell Merchandise on Stellar
Add-on items can help boost revenue.
Adding merchandise to your ticket offers is a terrific way to both increase your revenue through add-ons and give your customer a souvenir from a great online event. When you offer physical products or extra experiences, those options are presented to the customer after they have selected their ticket but before completing checkout. Merchandise offers are given high visibility before the customer completes their purchase.
HOW TO ADD MERCHANDISE TO A TICKET OFFER
- Add Merchandise
- Add Inventory
- Add Price Point(s)
- Customer View
- Access Customer Mailing Addresses
Add Merchandise
After you have added your event, performance and have ticket inventory available, you can list merchandise by clicking the Merchandise button on the sidebar and then clicking the +Add Merchandise button. Add a title for your merch and then click Submit. In this example, we're going to offer a t-shirt.
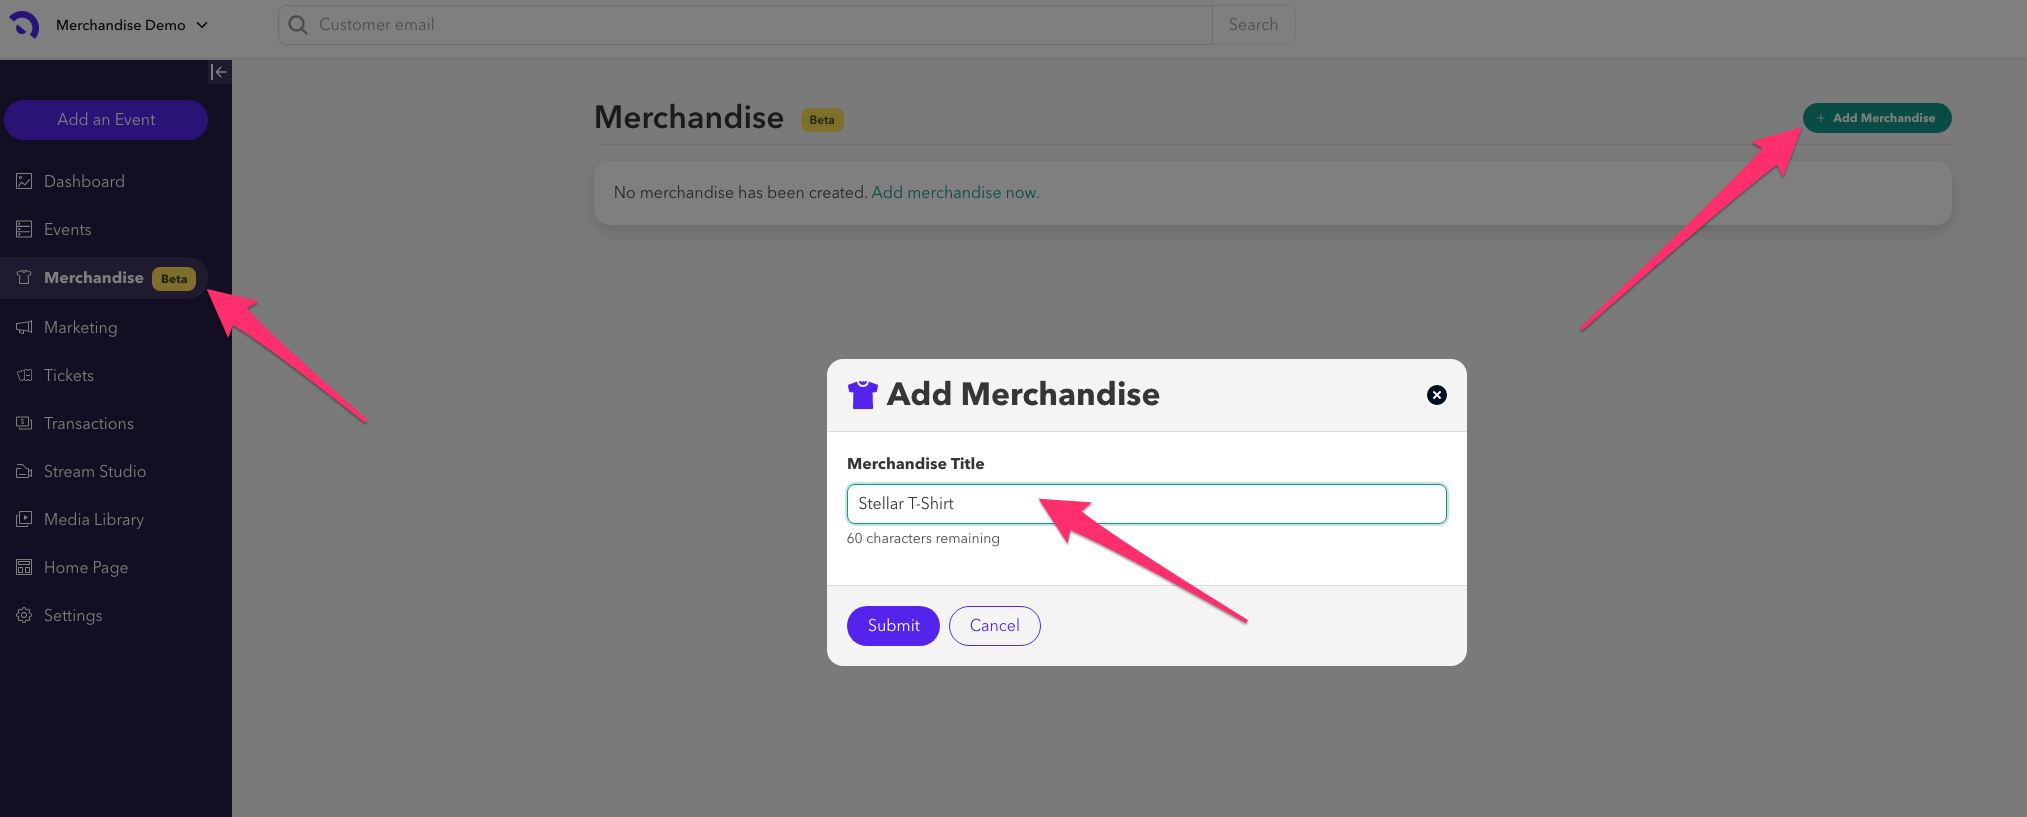
Next, you'll want to add the description for your merch. It's recommended that you keep your inventory and price points name short (offers a cleaner layout to folks making purchases from mobile devices) so it's best to include any necessary merch details here.
![[video-to-gif output image]](https://cdn.prod.website-files.com/61e7417295afa6377f1011b0/61f869abb71e0fbb22ebdc51_ezgif-4-c472a2f51b3c.gif)
Add Inventory
Click + Add an Inventory and then give your item a short name. In this case, we'll be selling multiple sizes of t-shirts. If you have multiple colors of the item you are offering, make sure to distinguish the color/variation in the inventory name (ex. Black T-Shirt, Small). When building inventories, it's imperative that you click the Name and Address Checkout Question box to collect mailing information with the purchase. You will be responsible for mailing any physical items to customers. Click Submit when finished.
In the description field, you may also include details about shipping, returns and information helpful to your customers. Read more on Merchandise Best Practices.

Add Price Point
You'll then add a Price Point for the t-shirt. Click the ellipses (...) and select Add a price Point. You'll then enter a short name for the price point, a price, a group size and purchase limited (if applicable), when you would like the item to appear and when you would like it to go on sale and come off sale. Typically, the visible, on-sale and off-sale dates would match with your ticket offer. You also have the option to setup and add a Shipping Fee while configuring your Price Point for any particular item.
It's important to note that your merchandise items will be available on any event to which you add them as an Upsell item, and displayed on your public-facing event organizer home page if you have published the home page.
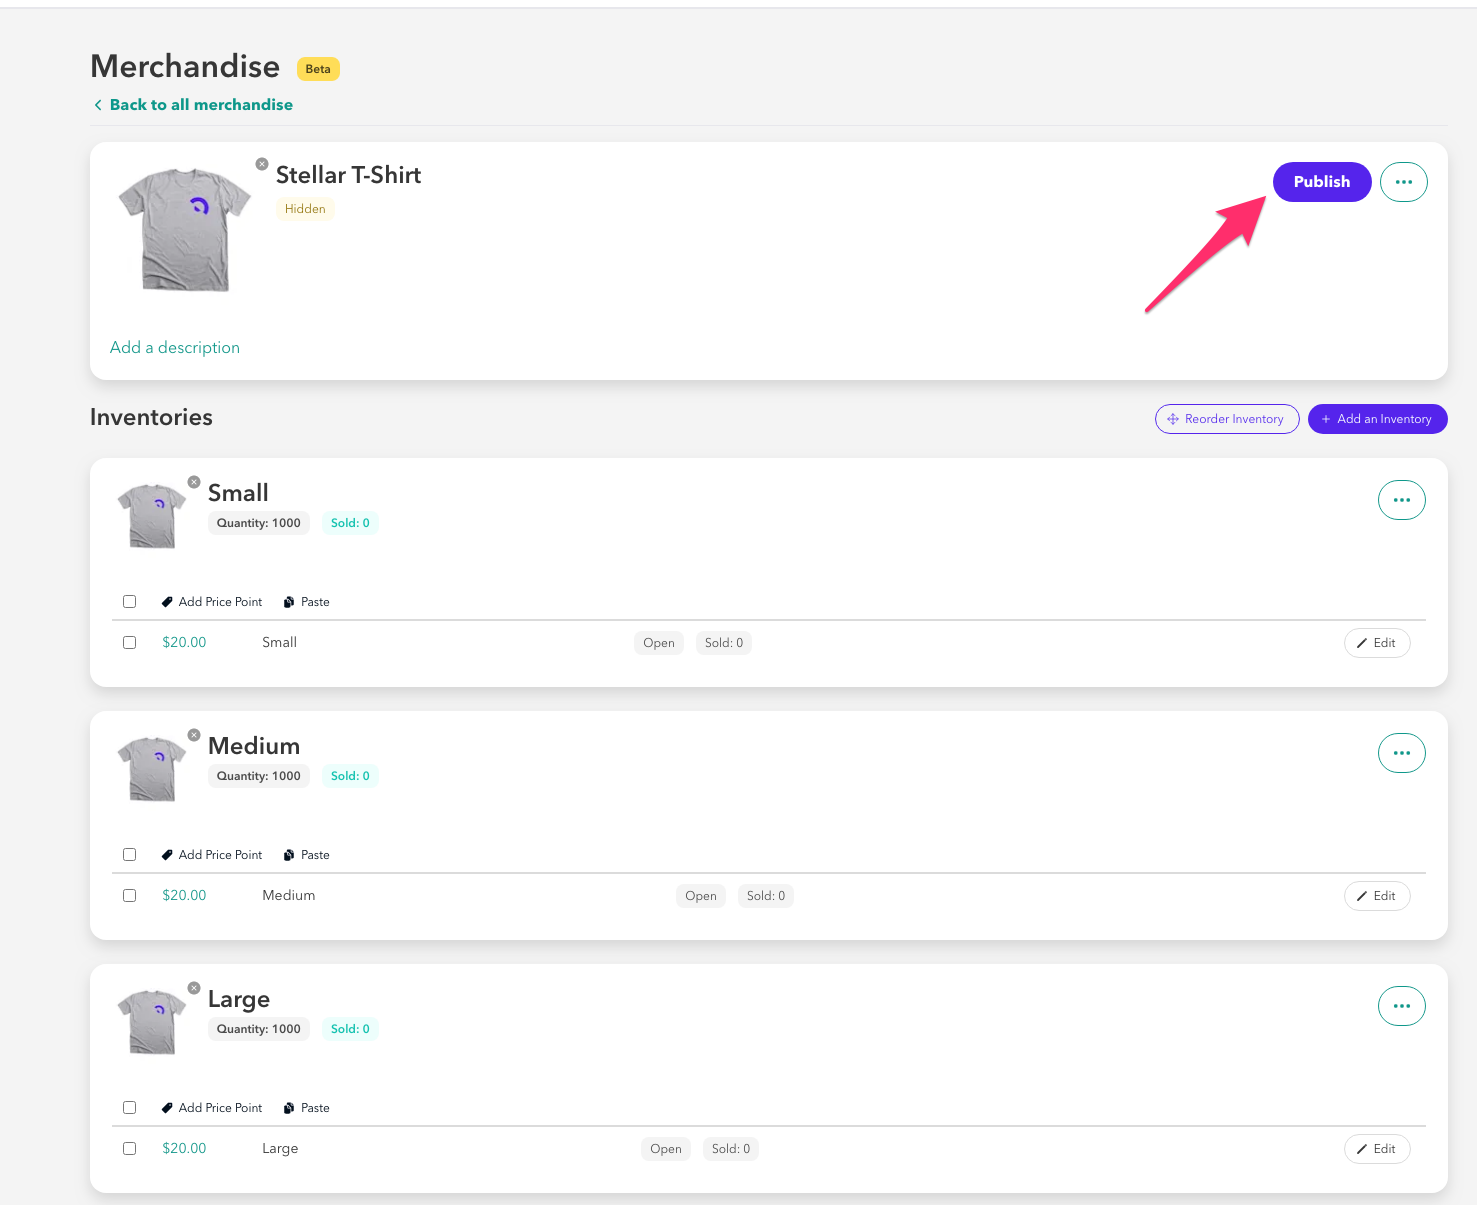
Because we're selling t-shirts in this example, you'll want to replicate the Inventory and Price Point steps for additional sizes and add an image. When complete, the page will look like this. Click the blue Publish button when you are ready to make the items available.
ADDING AN UPSELL
Once you've created your merchandise inventory, you can then add it to any performance as an upsell. To do this you will go to the performance(s) you want to add the merchandise to and go to the UPSELL SETTINGS section and click ADD. From the drop-down menu, you will select MERCHANDISE and then select the merchandise you'd like to include and click ADD. This will add this to the checkout process for customers for that specific performance. If you want to include this in multiple performances you will need to edit each performance to include this upsell.

WHAT DOES THE CUSTOMER SEE?
After selecting their ticket and clicking checkout from your event page, any merchandise you have on sale will be displayed on the next page. Customers can select multiple items and click the Add to Cart button. When they've selected their items, a customer would click Continue to Checkout to enter payment information and complete the purchase. Just like ticket checkout, items will stay in a cart for 45 minutes and will expire unless purchased within that time.

All available merchandise is also shown on your event organizer home page on Stellar. This allows customers to purchase merchandise outside of a ticket purchase. If a customer buys a show ticket, but later decides they'd also like a t-shirt, mug or other item, direct them to your home page on Stellar.
HOW TO ACCESS MAILING ADDRESSES FOR PHYSICAL ITEMS
After ticket sales for an event close, you'll want to take care of mailing merchandise items to your customers. To get their mailing addresses, you will run a report on your ticket sales. Note that any mailing address information you have requested for Merchandise sales will be under "Answers," which are the responses to the questions you have required during checkout. Select the fields required on your report and click Export. A few minutes later, you will receive an email with ticketing information, including who purchased merchandise and their mailing address.
If you forgot to include an opt-in request for the customers' mailing address, don't worry. You'll always have everyone's email address and can contact your customers to request their mailing address for shipping the merchandise.