How to Create a Livestream + VOD Ticket Offer
How to add a ticket with a livestream and a video on demand.
If you're on our Professional or Volume plans you have the option to include a Video on Demand (VOD) to your performance.
Add the Performance
Once your event is created, click Add Performance.
- Start Date/Time: Your start date and time will be the date and time your live stream starts.
- Running Time: Enter the running time of your show here, in minutes (for a two-hour show, you would enter 120). You can enter an approximate time here, it doesn't have to be exact.
- Time Zone: Select your Time Zone. The time zone you choose here is the same time zone you will use when you create your video-on-demand in Stream Studio later on.
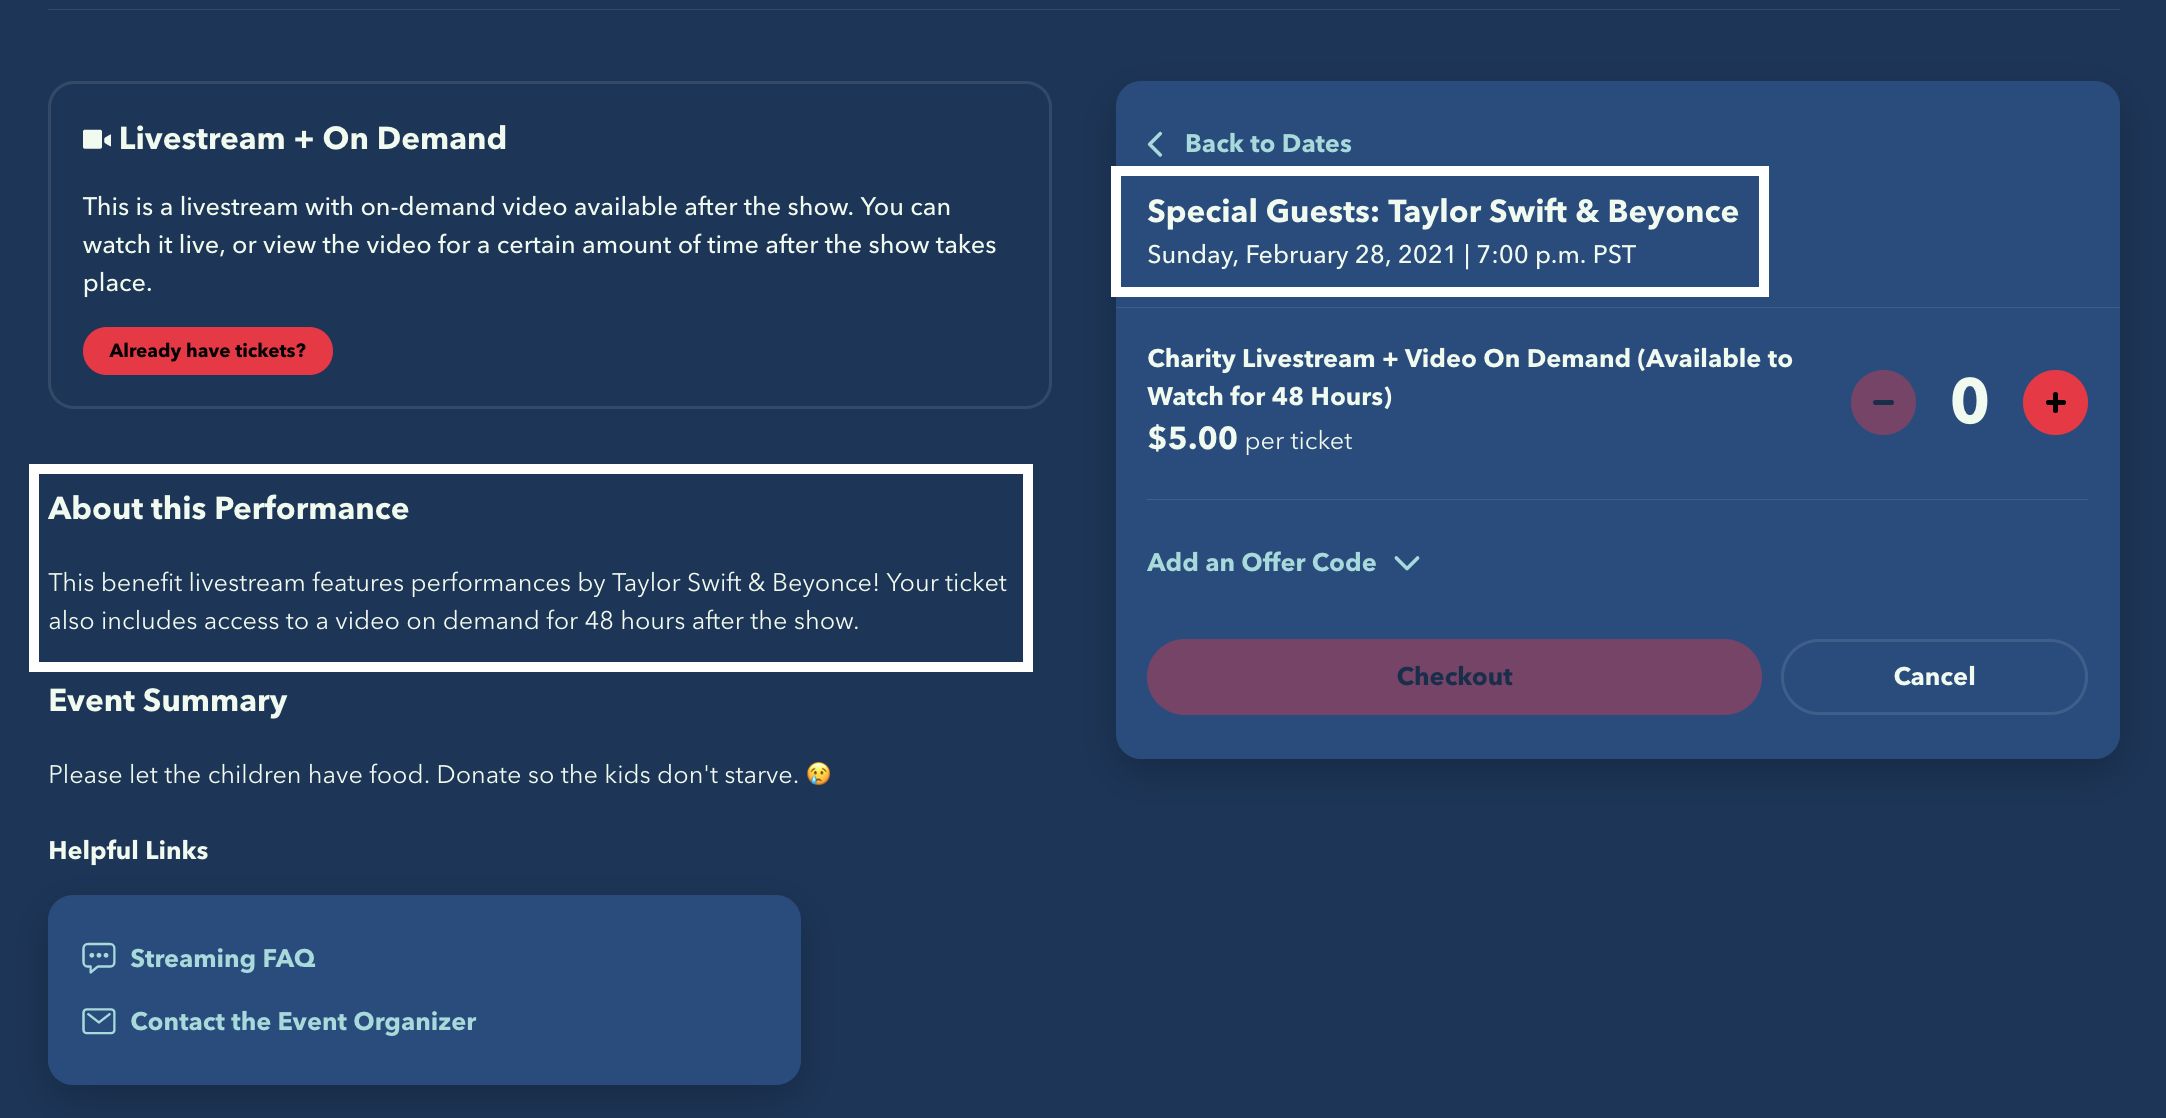
- Performance Name: This is optional. It's a good idea to include a performance name when you have different features on different dates, like a special guest, rotating headliner, or a different show title each date.
- Performance Summary: This field is optional, it's a great place to put details that are specific to this date (such as a headliner or guest bio).
Here's an example of performance creation:

Here is what the performance page will look like to customers. The Performance Summary and Performance Name are in the white boxes:
Add the Inventory
After your performance is added, click +Add an Inventory.
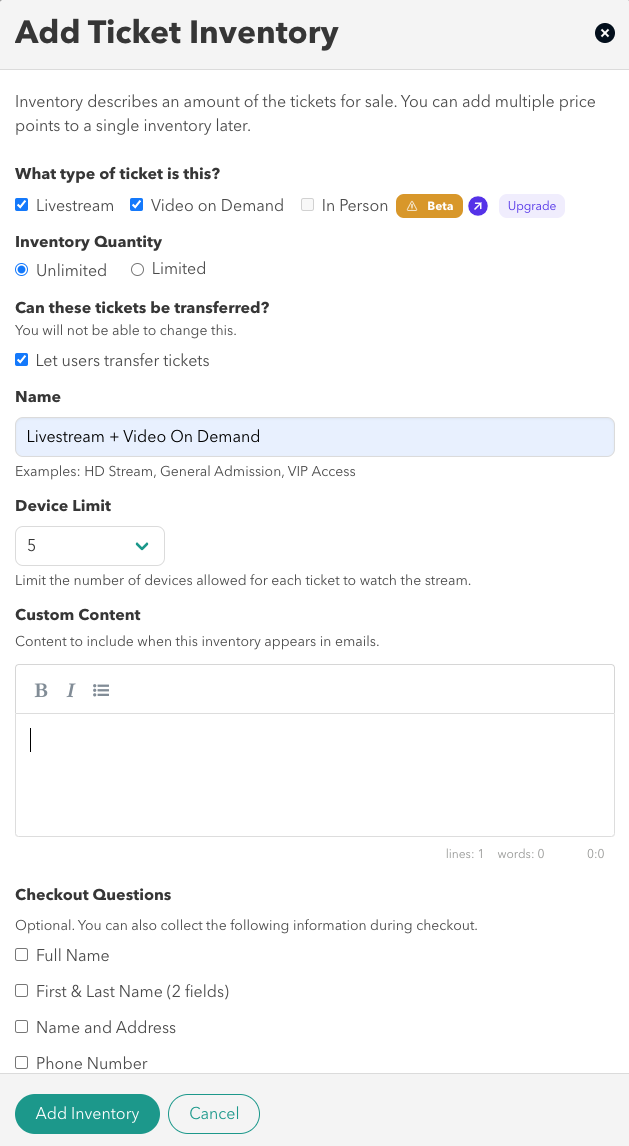
- Ticket Type: Check the box for Livestream and the box for Video On Demand.
- Inventory Quantity: Limit your inventory as needed. For online events, limits typically aren't necessary, as capacity is unlimited.
- Ticket Transferring: Would you like to allow your customers to transfer/gift their tickets to their friends and family? If this option is selected, the purchaser will be able to transfer their ticket to an alternate email address belonging to their gift recipient. Once you add this inventory, this option cannot be changed later.
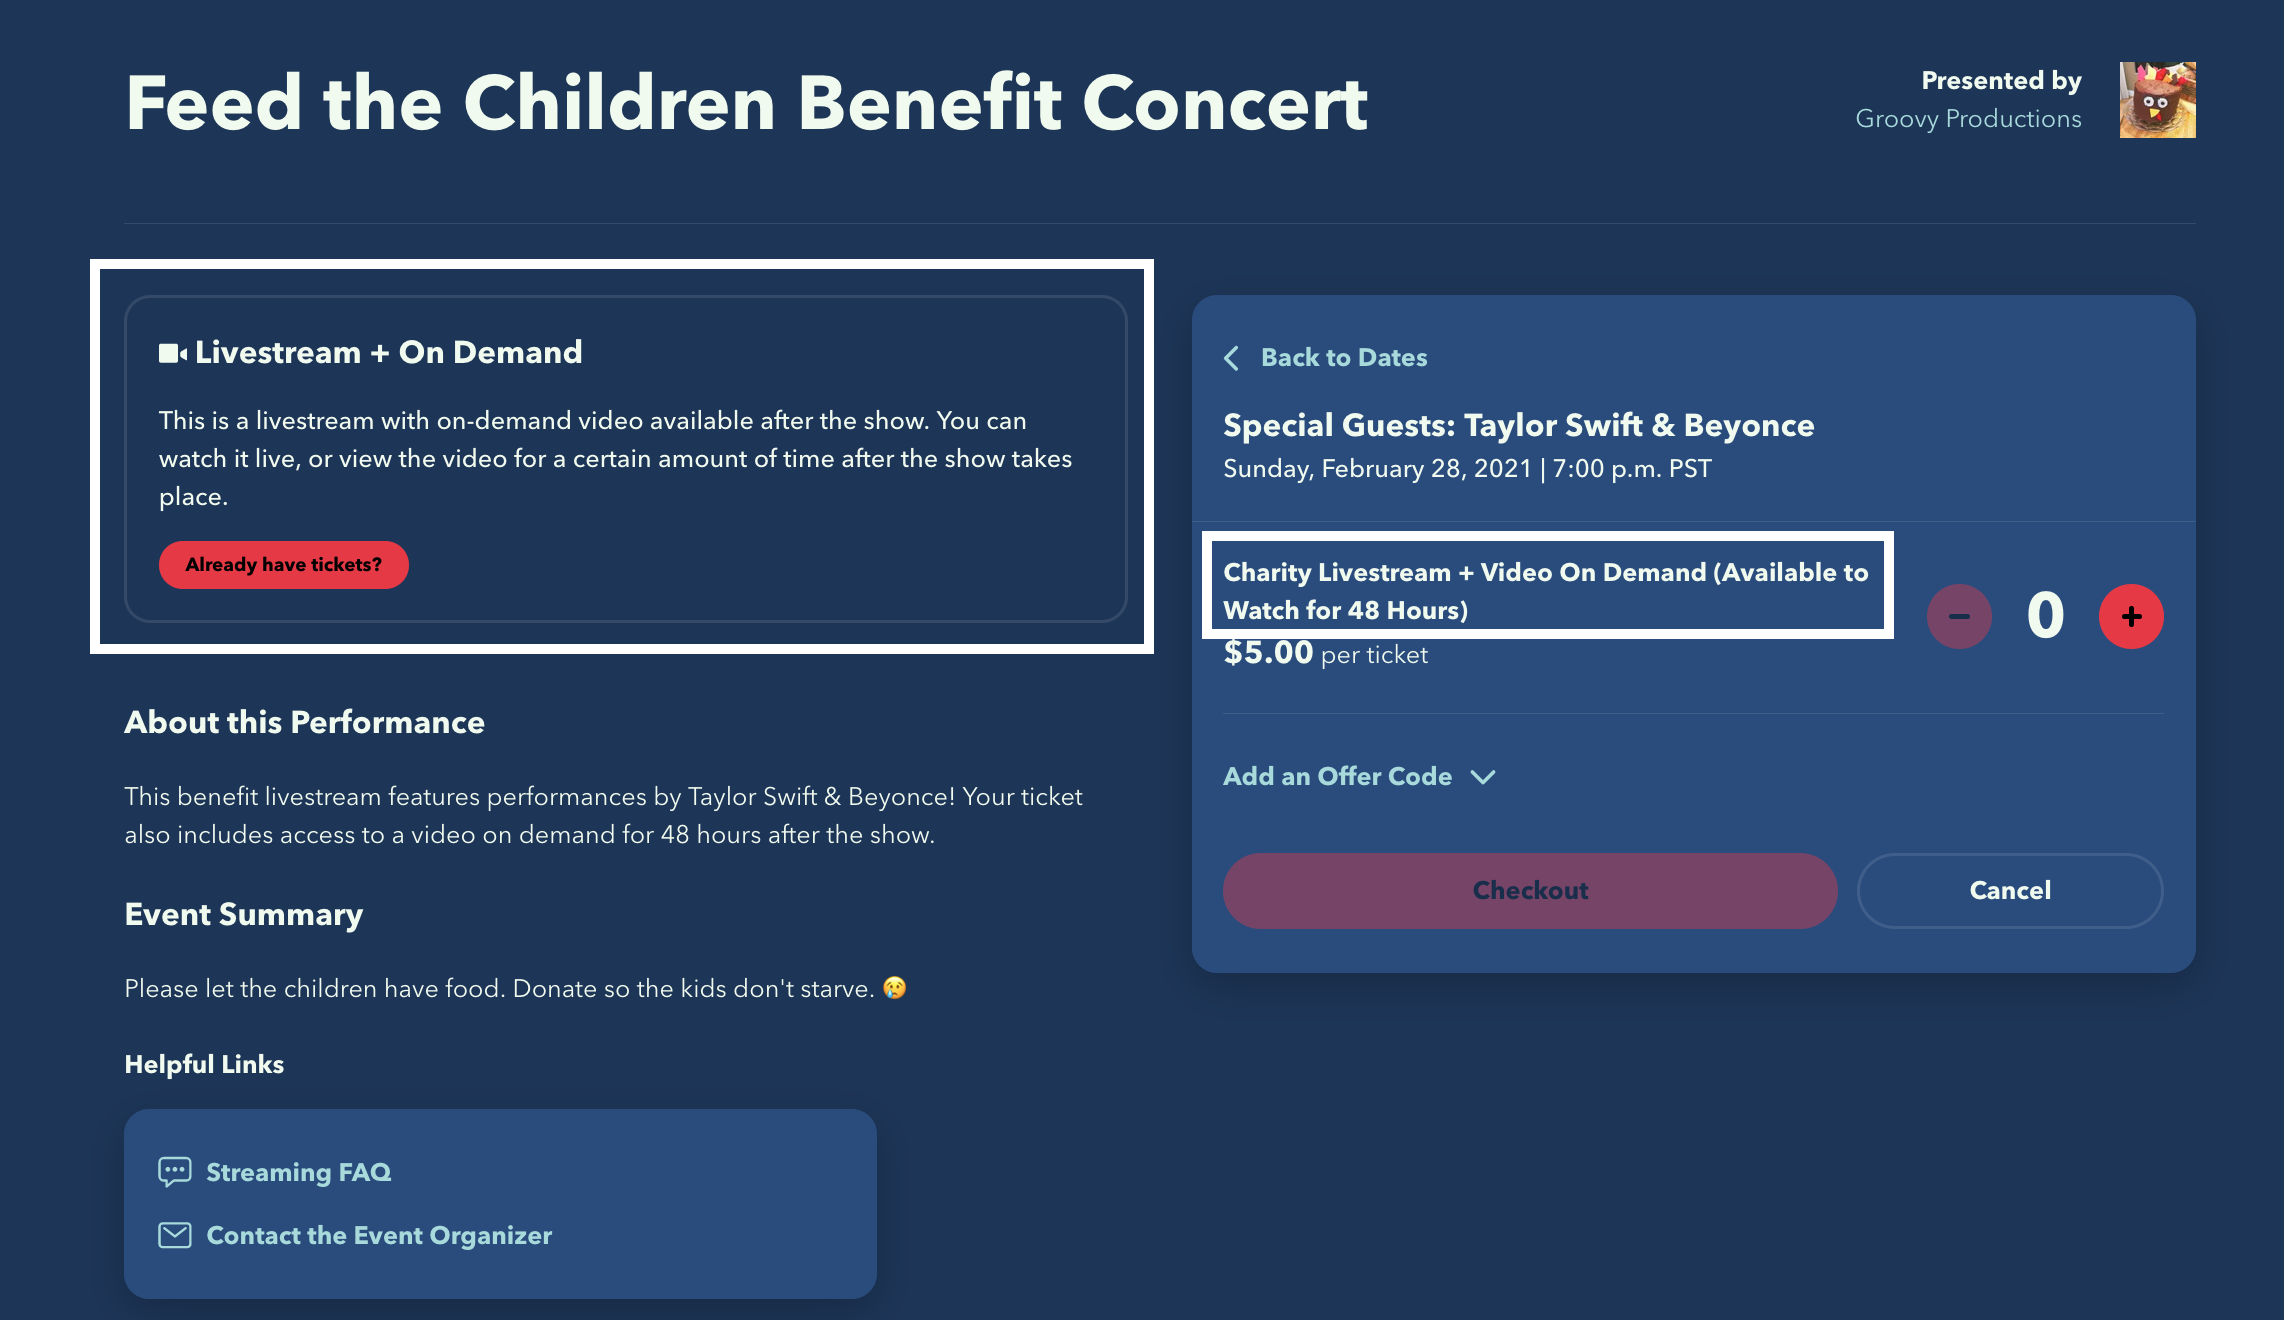
- Name: Name your inventory whatever you'd like. We recommend including "Livestream + Video In Demand" in the inventory name. It's also a good idea to include the viewing window of the VOD.
- Device Limit: The number of devices that can be used under each ticket
- Custom Email Content: Any information entered into this field will be included whenever an email is sent to your customers who have purchases this inventory. More information here.
- Checkout Questions: Select the information you want your customers to provide at checkout.
Here's an example of inventory creation:
And here's what that looks like to customers. The white box on the left shows the message that appears when you have both Livestream and On Demand checked. The white box on the right shows how the inventory name appears:
If you are doing a fully live event and including a VOD for your customers, it is important to note on your event page that the VOD will not be available immediately after the livestream ends. You will need to save your new video, make any needed edits, convert the file, upload the file and then wait for Stellar to transcode the file for broadcast. It is a process that will take several hours, so include a note to set expectations on when your customers will have access to the VOD.
Add a Price Point
Finally, you'll add your price points. Each Inventory will have a a menu button indicated by three dots. Click that and select Add a Price Point.
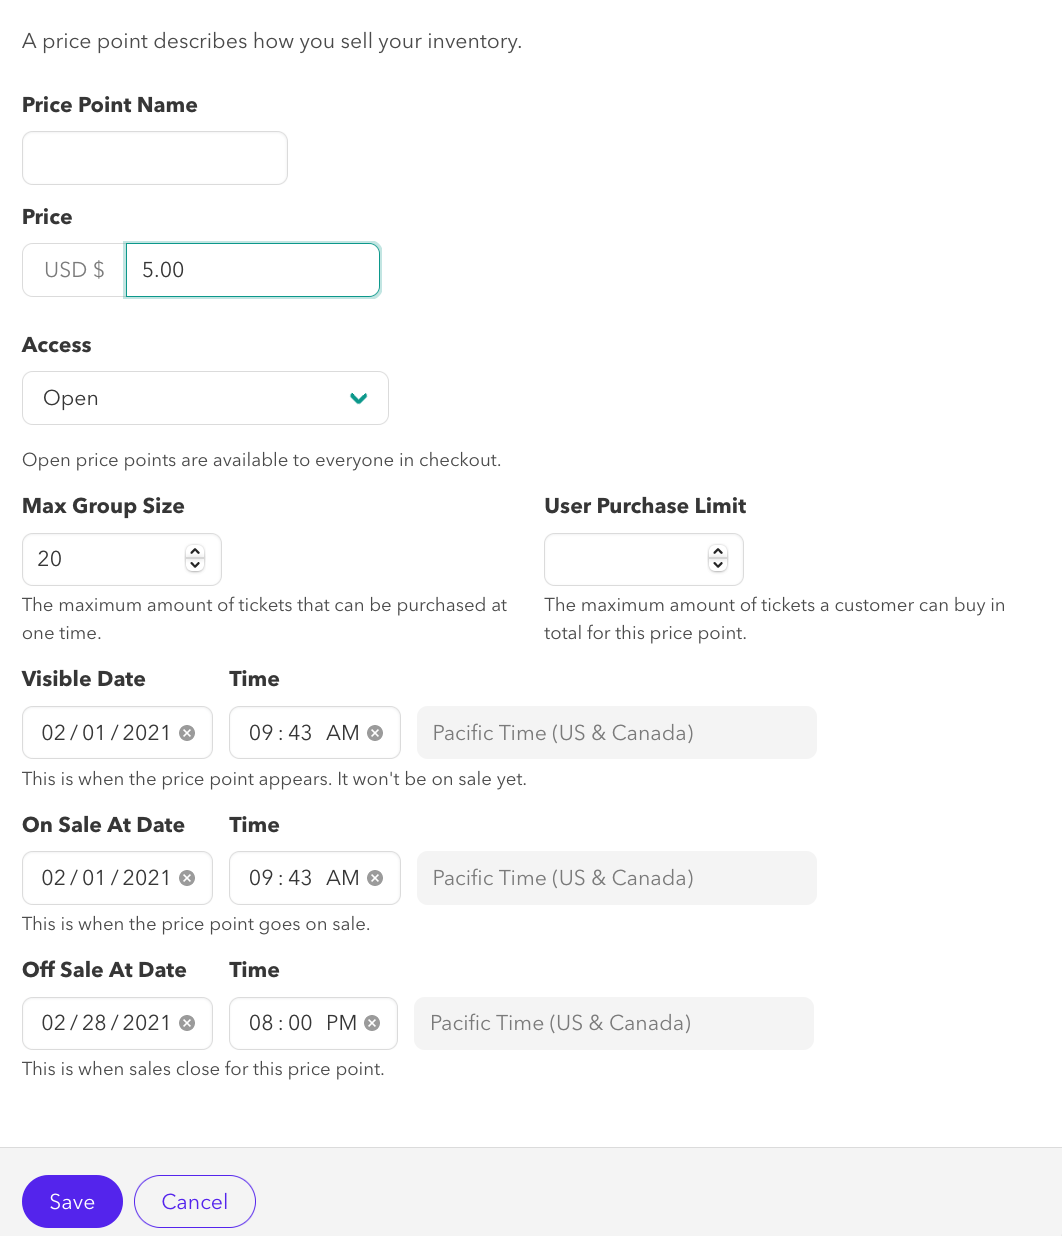
- Price Point Name: The price point name is optional. You can use it to describe each price point when you will have multiple price points on one ticket type (Examples: Early Bird, Limited Time Offer, Members Only).
- Price: Set your price.
- Access: This is where you choose who can access this price point. Choose "Open" if this price is available to anyone. Choose "Requires an Offer Code" if purchasers must enter an offer code to access this price. Choose "Requires a Redemption Code" if this price is only available to third-party customers who have a redemption code.
- Max Group Size + User Purchase Limit: The Max Group Size is the maximum number of tickets that can be purchased at once. The User Purchase Limit sets a limit on how many tickets can be purchased in total by a single user.
- Visible Date/Time: This is the date and time your offer will appear on Stellar. You can choose to have the offer appear before it's on sale so customers can see when it will be available:
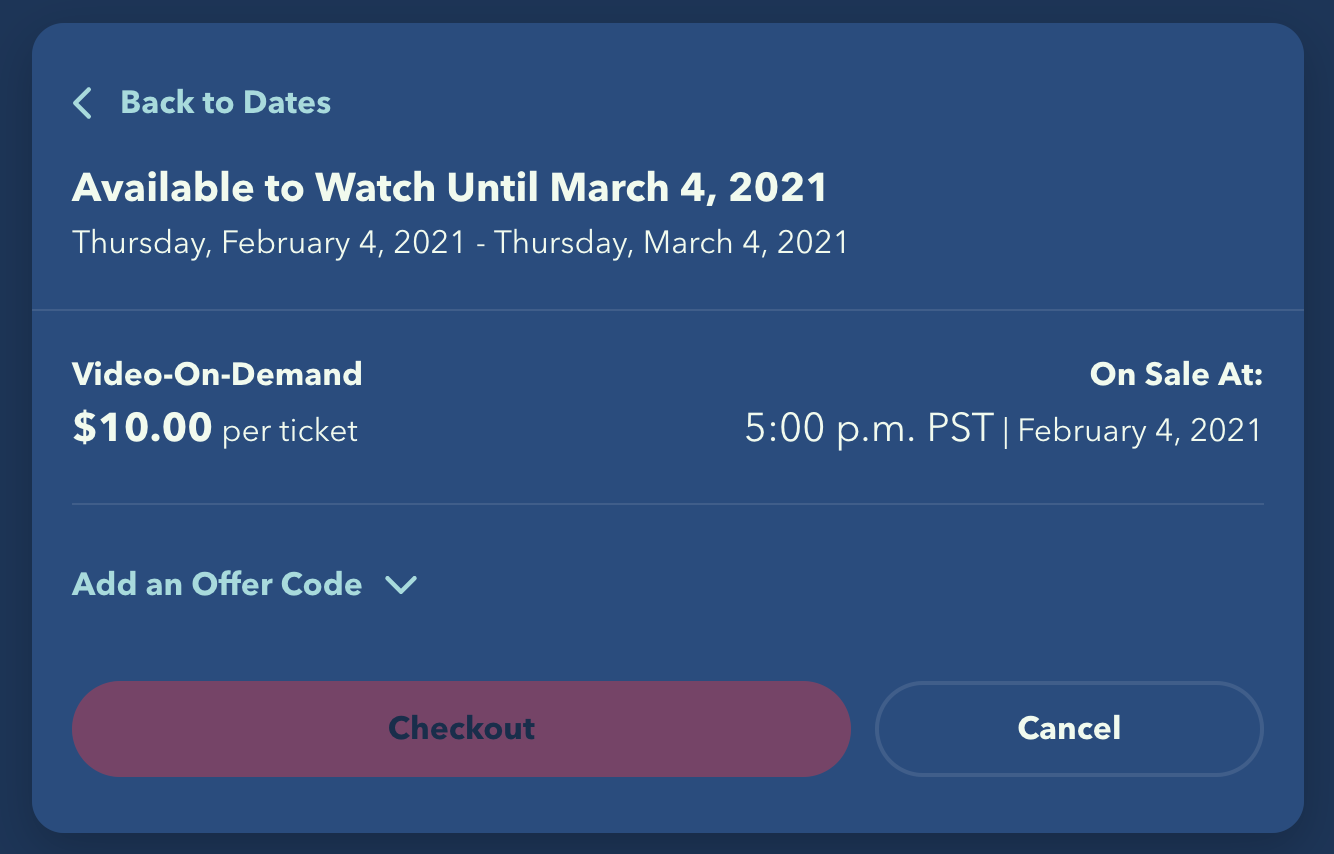
- On Sale Date/Time: The date/time customers can begin to purchase tickets.
- Off Sale Date/Time: The date and time when tickets will go off sale -- NOT the date and time the VOD expires. For a livestream + VOD ticket, it's a good idea to take the offer off sale when the livestream starts, or soon after it starts. You can create a VOD-only offer to go on sale after the livestream.
Here's an example of price point creation. Ticket sales are set to expire at the end of the livestream (8:00pm) so latecomers can still buy a ticket if they want to join the stream in progress and rewatch the whole show later on VOD.
You did it! Once you save your price point, your Livestream + VOD offer is all set up. Don't forget to upload the VOD after the livestream ends. Read more on uploading your VOD asset and creating a VOD.
