How to Create a Video-on-Demand (VOD) Only Offer
If you're on our Professional or Volume plans you have the option to include a Video on Demand (VOD) to your performance.
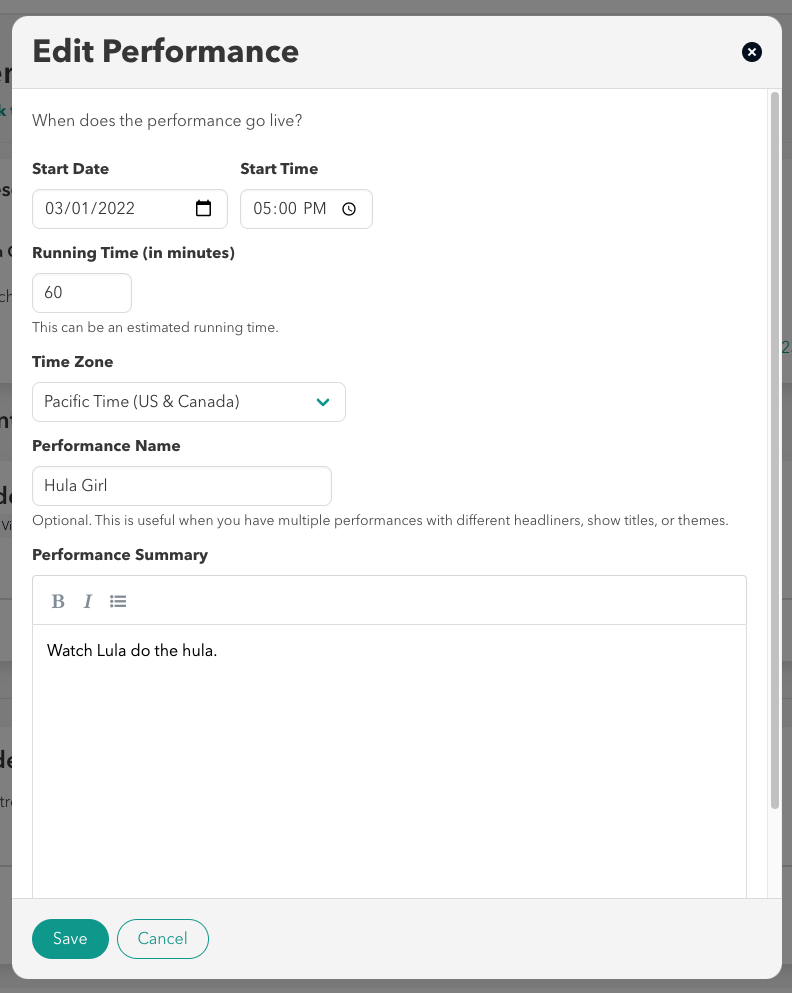
1. Once your event is created, click +Add a Performance.
- Start Date/Time: Your start date and time should be the date and time your Video On Demand (VOD) becomes available to watch.
- Running Time: How long is the file for your video on demand in minutes?
- Time Zone: Select your Time Zone. The time zone you choose here is the same time zone you will use when you create your video-on-demand.
- Performance Name: This is optional, but can be helpful if any one performance will be unique in relation to the others.
- Performance Summary: This field is optional and can be used to include information if different dates will include different artists, content, etc.
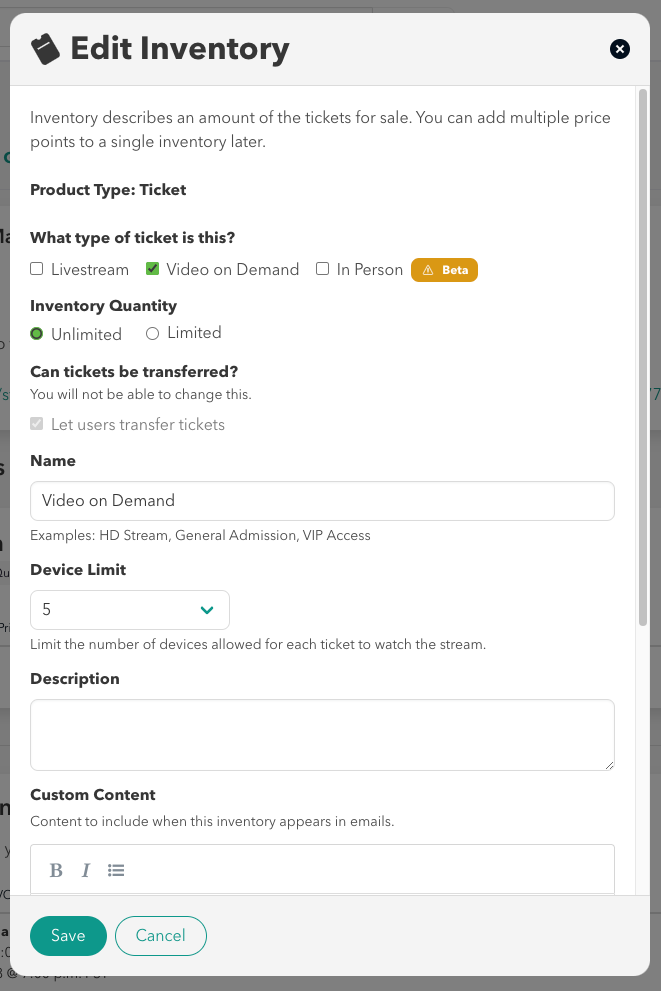
2. After your performance is added, click +Add an Inventory.
- Ticket Type: Make sure only the box next to "Video on Demand" is selected for VOD-only offers. The box next to "Livestream" must be unchecked if you don't have a live component to your offer.
- Inventory Quantity: Limit your inventory as needed. For online events, limits typically aren't necessary, as capacity is unlimited.
- Ticket Transferring: Would you like to allow your customers to transfer/gift their tickets to their friends and family? If this option is selected, the purchaser will be able to transfer their ticket to an alternate email address belonging to their gift recipient. Once you add this inventory, this option cannot be changed later.
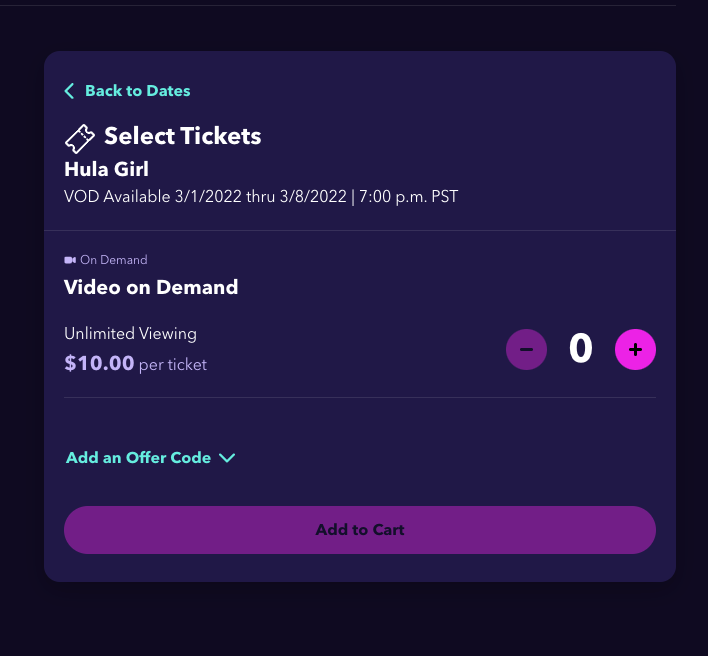
- Name: Name your inventory whatever you'd like. "Video on Demand" is our suggestion for VOD-only ticket offers. The inventory name appears just above the ticket price on the screenshot above.
- Device Limit: The number of devices that can be used under each ticket
- Custom Content: Information that you'd like to relate to your customers in the emails Stellar sends.
- Checkout Questions: Select which information you want your customers to provide at checkout. This will become available to you after their purchase.
3. Click +Add a Price Point.
- Price Point Name: The price point name is optional. You can use it to describe each price point when you will have multiple price points on one inventory (Examples: Early Bird, Limited Time Offer, Members Only).
- Price: Set your price.
- Access: This is where you choose who can access this price point. Choose "Open" if this price is available to anyone. Choose "Requires an Offer Code" if purchasers must enter an offer code to access this price. Choose "Requires a Redemption Code" if this price is only available to third-party customers who have a redemption code.
- Max Group Size + User Purchase Limit: The Max Group Size is the maximum number of tickets that can be purchased at once. The User Purchase Limit sets a limit on how many tickets can be purchased in total by a single user.
- Visible Date/Time: This is the date and time your offer will appear on Stellar. You can choose to have the offer appear before it's on sale so customers can see when it will be available:
- On Sale Date/Time: The date/time customers can begin to purchase tickets for your Video On Demand.
- Off Sale Date/Time: The date and time when tickets will go off sale -- NOT the date and time the VOD expires. Make sure to take tickets off sale with enough time for anyone who purchased to view the VOD.

- Click Add a VOD. This is where you will set the availability and expiration dates for your video on demand. You don't need to assign the asset at this point but if you don't, you just need to remember to upload the asset and assign it to this VOD before the time noted as the VOD start time. After VOD assets are uploaded and assigned, they take approximately 15-90 minutes to transcode depending upon the size of the file. Be sure to allow adequate transcoding time when setting up your asset.

Once you've set up your Video on Demand ticket, you still need to upload the video asset, then create and schedule your Video on Demand. Make sure you have your Video on Demand set up and ready-to-go at least 15 minutes before it's available for customers to watch. Take into account upload and transcode times, which can take up to several hours depending upon the file size. You can set it up at any time -- the earlier, the better. Purchasers will receive an email when the VOD is available to watch. Read more on uploading your VOD asset and creating a VOD.
Once you've got your VOD ticket and VOD instance created, your customers will see the information on the purchase page when making their ticket selection.