
How to Build and Assign a Video on Demand (VOD) to A Performance
Sell on-demand content to your customers
A Video On Demand (VOD) is a great addition to your ticket’s value. Customers are more likely to buy if they know they can still watch the performance even if something comes up and they miss the livestream, or if they can watch a performance they loved multiple times. Once a VOD is available, the customer can watch it from their unique ticket page for as long as it's available.
The use of VODs is only available in the Professional and Volume packages.
What you should know about Video On Demand:
- Adding a Video On Demand is not the same as scheduling a pre-recorded broadcast to stream live at a specific time. VODs are available to watch at any time within a set window.
- Stellar Stream Studio does NOT record livestreams for you. If you'd like to make a livestream available as VOD after, you'll need to record the stream yourself so you can upload it for the VOD later.
- Chat and widgets are not available on VODs.
Add a Video On Demand from Performance Settings
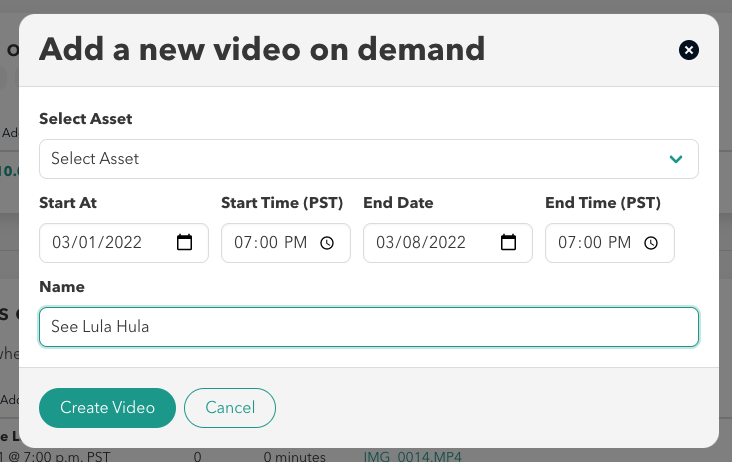
Set the range of availability for your video on demand. You can upload and assign the .mp4 file later.
- Click Add a VOD (located underneath last inventory)
- Select what asset you'd like to use for the VOD if you have it. Please note the file name should be clear of hyphens (-) and replaced with underscores (_) if necessary. If it's not ready yet, skip this step.
- Select the date you would like the VOD's range of availability to start and the time you'd like the VOD to expire as the end date/time.
- Select a name for your VOD
- Click Create Video
If you don't assign a file to your VOD right away, don't forget to assign it before the advertised start time for the VOD.
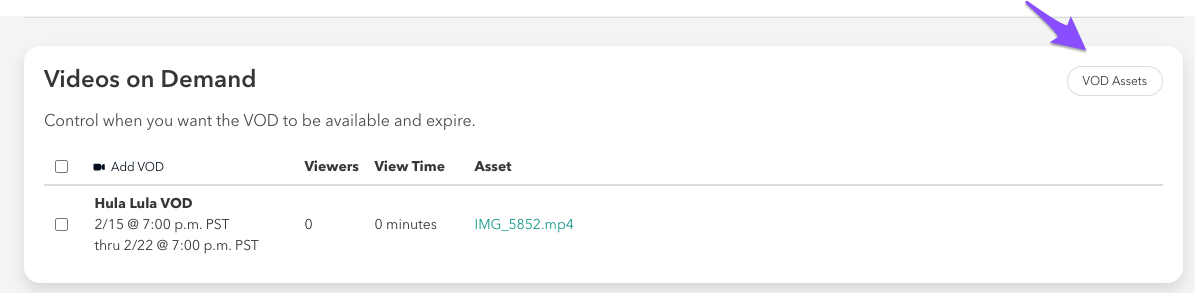
Assigning the Asset
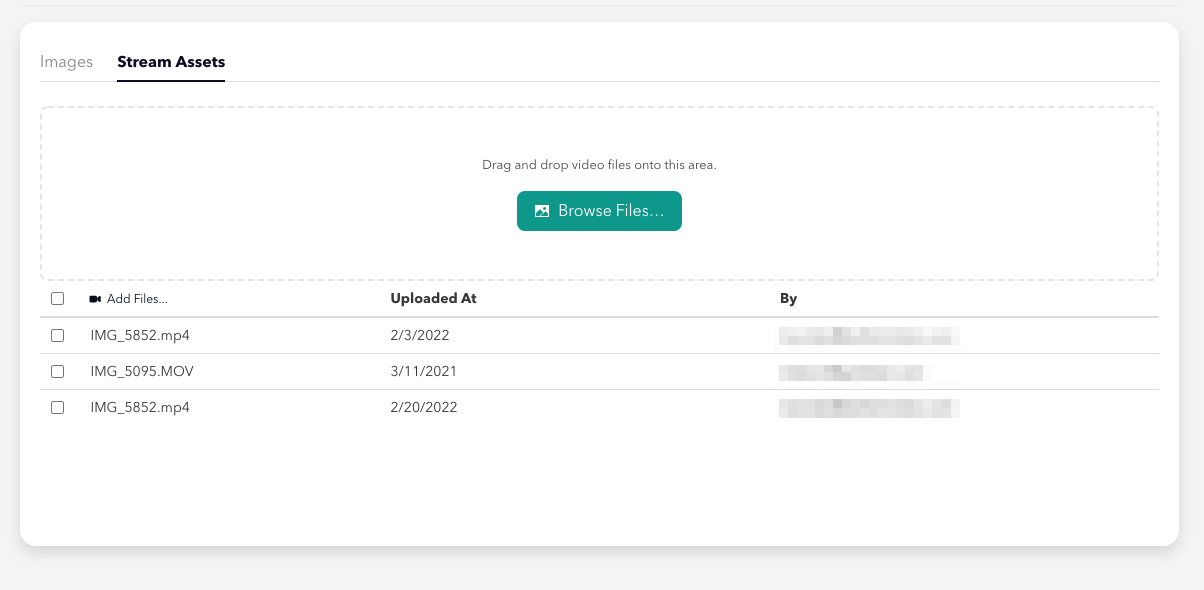
Upload the asset(s) to the Stream Assets tab in your Media Library or via the VOD Assets button on the performance page. Your asset(s) should be in .mp4 format and in 1080p 30 FPS.
Select the asset for the VOD from the menu, add your start/end dates and times, and name the VOD. The name for the VOD should be the event title. Please note that the name given to the VOD here is what your customers will see on their ticket.
Click Submit and your VOD will begin to transcode. The transcode process can take from 15 minutes to several hours depending on your file size. Please be sure to allocate time for this process when scheduling your VOD. Once the file is done transcoding, you're all set!
Make sure to repeat these steps for each available performance of your event that has offers for the VOD for sale.